Inside `objFunction`: 13// 처음에 인자로 전달한 값을 받음 Inside `bar`: 13// Arrow Function에서 this는 일반 인자로 전달되었기 때문에 이미 값이 13로 지정됩니다.
즉, Arrow Function 안의 this는 objFunction의 this가 됩니다.
그리고 이 ArrowFunction은 this의 Scope를 바꾸고 싶지 않을 때 특히 유용합니다.
1 2 3 4 5 6 7 8 9 10
// ES5 function에서는 `this` Scope가 function안에 들어가면 변하기 때문에 새로운 변수를 만들어 씁니다. var someVar = this; getData(function(data) { someVar.data = data; });
// ES6 Arrow Function에서는 `this` Scope의 변화가 없기 때문에 `this`를 그대로 사용하면 됩니다. getData(data => { this.data = data; });
이와 같이 Arrow Function에서는 .bind method와 .call method를 사용할 수 없습니다.
즉, 비슷하게 보이지만 실제로 동작하는 것이 다르기 때문에 사용하는 때를 구별하는 것이 필요합니다.
Arrow Function은 new로 호출할 수 없다
ES6에서 함수는 callable한 것과 constructable한 것의 차이를 두고 있습니다.
만약 어떤 함수가 constructable하다면 new로 만들어야 합니다. 반면 함수가 callable하다면 일반적인 함수처럼 함수()식으로 호출하는 것이 가능합니다.
function newFunc() {}와 const newFunc = function() {}와 같은 방식으로 만든 함수는 callable하며 동시에 constructable합니다. 하지만 Arrow Function(() => {})은 callable하지만 constructable하지 않기때문에 호출만 가능합니다.
Locale이란 세계 각 나라에서 가지고 있는 언어, 날짜, 시간 등에 관해 i18n(국제화)를 통해 같은 프로그램이더라도 OS별로 설정되어있는 것에 따라 어떤 방식으로 출력할지 결정하게 되는 것을 말합니다.
Locale은 단순히 언어 번역뿐만 아니라 시간과 날짜등을 표시하는 형태도 결정하게 되는데요, 예를들어 한국에서 2017년 7월 10일이라고 표현한다면 미국에서 07/10/2017와 같은 형식으로 표현할 수도 있는 것이죠. 영국이라면 10/07/2017이라고 표현할 수 있는 것 처럼요.
이와 같이 프로그래머가 한 코드에서 각 국가와 언어권에 맞도록 출력 형태를 결정하도록 OS에서 안내해 주는 것이 Locale입니다.
한국의 Locale
한국의 Locale은 보통 ko_KR.UTF-8로 사용합니다. 만약 많이 오래된 서버라면 ko_KR.EUC-KR일 수도 있어요.
Ubuntu의 기본 Locale
만약 여러분이 AWS나 Vultr등의 외국 회사에서 제공하는 우분투 이미지를 사용하고 있다면 아마 기본 설정은 en-US.UTF-8일 가능성이 큽니다. 그리고 만약 여러분이 미국권에서 사용하는 형식에 익숙하다면 (그리고 프로그램에서도 Locale이슈가 없다면) 이 설정을 굳이 한글로 바꾸실 필요는 없습니다. 하지만 가끔 업체마다 Locale정보를 공란으로 둔 이미지를 제공하는 경우가 있습니다. 그런 경우 기본값으로 한국어 UTF-8을 이용하는 것은 나쁘지 않은 선택입니다.
Ubuntu에 Locale변경하기
우선 여러분의 우분투에 깔린 Locale을 확인하려면 아래와 같은 명령어를 입력하면 됩니다:
1
locale
우분투에서 Locale을 변경하는 방법은 아래와 같습니다. 먼저 한글 패키지를 설치해 주세요.(이미 깔려있을수도 있습니다.)
1
sudo apt-get install language-pack-ko
그 다음으로는 locale-gen을 통해 Locale을 설치해 줍시다.
1
sudo locale-gen ko_KR.UTF-8
다음으로 dpkg-reconfigure을 이용하는 방법입니다. 아래와 같이 명령어를 쳐 주시고 나오는 화면에서 ko_KR.UTF-8을 스페이스로 선택(*모양이 뜨면 선택된 것입니다)후 엔터를 눌러 설정을 마무리 해 주세요.
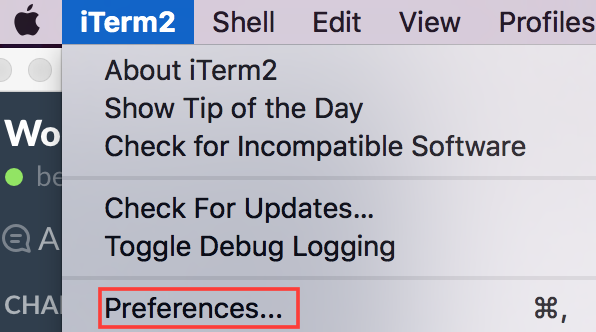
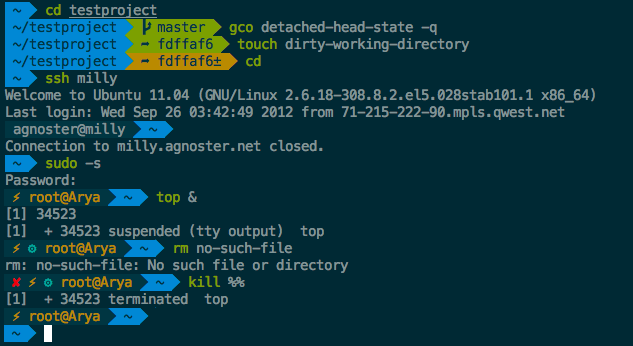
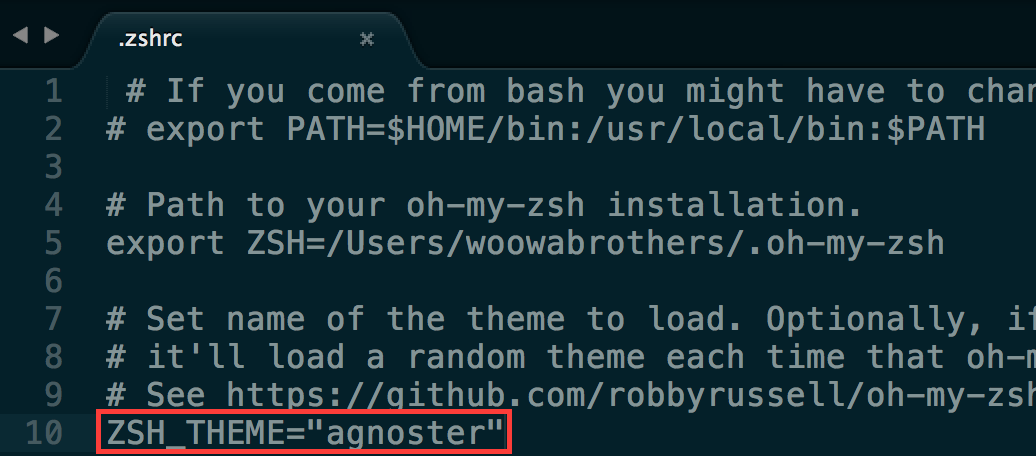
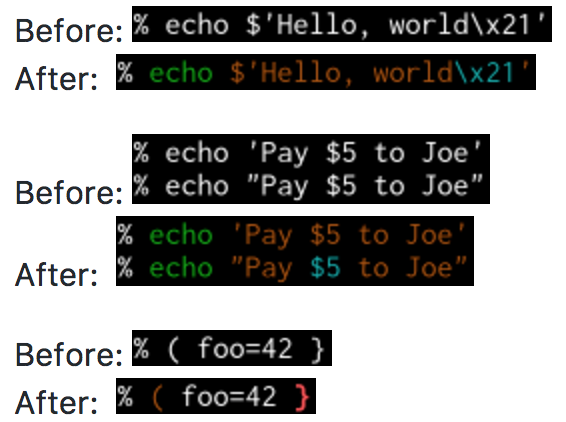
맥을 개발용으로 사용하는 경우 터미널을 좀 더 편리하고 다양하게 사용하는 방법 중 기본 Shell인 bash대신 zsh을 사용하는 경우가 많습니다. 그리고 oh-my-zsh을 함께 사용해 더 많은 기능을 편리하게 깔수 있기도 합니다. 물론 oh-my-zsh의 기본 테마인 robbyrussell도 예쁘지만, 약간 아쉬운 점이 남기도 하죠. 좀 더 예쁘고 사용하고싶어지는 기분이 들도록 agnoster테마를 깔고 Oceanic Next색 테마를 입힌 후 터미널에서 사용하는 명령어가 제대로 쳤는지 확인해주는 zsh-syntax-highlighting를 깔아봅시다. 참, 터미널은 iTerm2라는 멋진 맥용 터미널을 먼저 깔아야 해요.
나만의 웹 크롤러 만들기 6번째 가이드는 크롤링을 병렬화를 통해 빠르게 진행하는 방법을 안내합니다.
지금까지 만들어온 크롤러들은 모두 한번에 하나의 요청만을 처리하고 있습니다. 물론 지금까지 따라오셨다면 충분히 크롤러들을 여러분의 의도에 맞게 잘 수정해서 사용해보셨을거라 생각합니다.
하지만 한 페이지만을 여유로운 시간을 갖고 크롤링하는 것이 아니라 여러 사이트 혹은 여러 페이지를 좀더 빠르게 긁어오는 방법에는 역시 N개를 띄우는 방법이 제일 낫다고 볼 수 있습니다.
만약 100만개의 페이지가 있다면 125만/25만150만/50만175만/75만1100만와 같이 4개로 쪼개서 돌린다면 더 빠르게 도는 것은 당연합니다.
하지만 전달해주는 페이지의 목록이나 페이지 숫자에 직접 저 수들을 입력하는 것은 상당히 귀찮은 일이기도 하고, 크롤링이 ‘자동화’를 위한 것이라는 면에 반하는 측면도 있습니다. 따라서 우리는 Python 자체에 내장된 병렬화 모듈을 사용할 예정입니다.
Python을 이용할 때 프로그램을 병렬적으로 처리하는 방법은 여러가지가 있습니다. 하지만 우리가 하는 일은 연산이 아니고 IO와 네트워크가 가장 큰 문제이기 때문에 multiprocessing을 사용합니다.
threading 모듈도 사용 가능합니다. 하지만 multiprocessing모듈을 추천합니다. threading모듈은 싱글 프로세스 안의 스레드에서 동작하지만 이로인해 GIL의 제약에 걸리는 경우가 생기기 때문에 성능 향상에 제약이 있습니다. (물론 우리는 CPU 연산보다 IO/네트워크로 인한 지연이 훨씬 크기 때문에 큰 차이는 없습니다.)
멀티프로세스란?
프로세스란 ‘실행 중인 프로그램’을 의미합니다. 간단하게 말해 멀티프로세스는 프로세스를 여러개 띄우는 것, 즉 프로그램을 여러개 실행시키는 것이라고 볼 수 있습니다.
Python에는 멀티프로세싱 프로그램을 위한 모듈이 multiprocessing이라는 이름으로 내장되어 있습니다.
가장 단순한 예시로, 임의의 숫자 리스트 (ex: [20, 25, 30, 35])를 받고 그 자리의 피보나치 수를 구해주는 프로그램이 있다고 가정해 봅시다.
만약 for문을 통해 리스트를 순회하며 계산한다면 아래와 같이 코드를 짤 수 있습니다.
주의: 명백한 코드 실행 시간 차이를 보여주기 위한 느린 코드입니다.
1 2 3 4 5 6 7 8 9 10 11 12 13 14 15 16 17 18 19
import time
start_time = time.time()
deffibo(n):# 회귀적 피보나치 함수 if n == 0: return0 elif n == 1: return1 else: return fibo(n-1) + fibo(n-2)
num_list = [31, 32, 33, 34] result_list = [] for num in num_list: result_list.append(fibo(num))
# parser.py import requests from bs4 import BeautifulSoup as bs import time
defget_links():# 블로그의 게시글 링크들을 가져옵니다. req = requests.get('https://beomi.github.io/beomi.github.io_old/') html = req.text soup = bs(html, 'html.parser') my_titles = soup.select( 'h3 > a' ) data = []
for title in my_titles: data.append(title.get('href')) return data
defget_content(link): abs_link = 'https://beomi.github.io'+link req = requests.get(abs_link) html = req.text soup = bs(html, 'html.parser') # 가져온 데이터로 뭔가 할 수 있겠죠? # 하지만 일단 여기서는 시간만 확인해봅시다. print(soup.select('h1')[0].text) # 첫 h1 태그를 봅시다.
if __name__=='__main__': start_time = time.time() for link in get_links(): get_content(link) print("--- %s seconds ---" % (time.time() - start_time))
# parser.py import requests from bs4 import BeautifulSoup as bs import time
from multiprocessing import Pool # Pool import하기
defget_links():# 블로그의 게시글 링크들을 가져옵니다. req = requests.get('https://beomi.github.io/beomi.github.io_old/') html = req.text soup = bs(html, 'html.parser') my_titles = soup.select( 'h3 > a' ) data = []
for title in my_titles: data.append(title.get('href')) return data
defget_content(link): abs_link = 'https://beomi.github.io'+link req = requests.get(abs_link) html = req.text soup = bs(html, 'html.parser') # 가져온 데이터로 뭔가 할 수 있겠죠? # 하지만 일단 여기서는 시간만 확인해봅시다. print(soup.select('h1')[0].text) # 첫 h1 태그를 봅시다.
if __name__=='__main__': start_time = time.time() pool = Pool(processes=4) # 4개의 프로세스를 사용합니다. pool.map(get_content, get_links()) # get_contetn 함수를 넣어줍시다. print("--- %s seconds ---" % (time.time() - start_time))
약 2.8초로 약 3~4배의 속도 향상이 있었습니다.
마무리 및 팁
멀티프로세싱으로 크롤링을 할 때 유의할 점은 Pool을 생성시 processes의 개수가 많다고 빠르지는 않다는 점을 유의하셔야 합니다.
두번째 parser.py파일을 실행 시 process를 4개인 경우 2.8s, 8개로 할 때 1.85s, 16개로 할 때 0.96s, 32개로 할 때 0.63s로 속도 향상이 두드러집니다. 하지만 64개로 할 때는 오히려 1.30s로 속도 지연이 발생합니다. 프로세스는 CPU코어(Hyper-Thread인 경우 2배) 개수의 2배(ex: 4코어 i5는 8개, 4코어8스레드인 i7은 16개)로 하면 가장 빠르지는 않지만 적당히 빠른 속도를 가져다줍니다.
다음으로는 웹 사이트에서 이러한 공격적 크롤링을 차단할 수 있다는 문제입니다. 잘 관리되는 사이트의 경우 이와 같은 공격적 크롤링은 사실 시스템 관리자에게 있어서는 공격 시도와 같이 보일 수 있기 때문에 적당한 속도를 유지하며 robots.txt를 존중해주는 것이 중요합니다.
무작정 빠르게 긁는다고 빠르지 않은 점에는 이 코드를 실행하는 컴퓨터의 네트워크 환경 자체가 제약이 되기도 합니다. 만약 핫스팟이나 테더링을 이용하거나 인터넷 속도에 제약을 받는 환경에서 이러한 작업을 돌린다면 오히려 네트워크쪽 문제로 인해 에러나 지연이 발생할 가능성이 높습니다. 이런 경우에는 processes개수를 2~4개로 맞춰서 크롤링을 진행하는 것이 최적의 속도를 이끌어낼 수도 있습니다.
다음 가이드에서는 실제 명령어를 받아 사용자들의 정보를 저장하고 사용자들에게 실제로 유용한 정보(예: 글 제목과 링크)를 보내주는 내용으로 진행할 예정입니다.
macOS에 프로그램을 설치하면 기본적으로 /Users/유저이름/Library(~/Library와 같음)에 위치합니다. 사용자의 Library에 저장되는 이 경로는 root 권한 없이도 응용프로그램을 추가하거나 제거하는 것이 가능합니다.
터미널에서 실행되는 경로, PATH
대부분의 운영체제에서는 PATH가 있습니다. 그리고 이 PATH에 등록된 경로는 시스템 전역에서 호출 가능한 위치가 됩니다. 예를들어 PATH에 등록된 경로 중 /usr/local/bin폴더가 있었다면 아래와 같이 python명령어를 실행할 경우 /usr/local/bin/python에 있는 파이썬이 실행됩니다.
1 2
➜ ~ which python /usr/local/bin/python
그리고 기본적으로 /usr/local/bin폴더는 사용자 터미널의 PATH에 등록되어있습니다. 따라서 SublimeText3(혹은 2) 실행 프로그램을 ln -s명령어를 통해 /usr/local/bin폴더에 심볼릭 링크를 걸어줘야 합니다.
심볼릭 링크란? 파일을 이동하지 않고 어떤 위치에 바로가기를 하나 더 만드는 것입니다. 윈도우의 바로가기 아이콘과 비슷하다고 생각하시면 됩니다.
SublimeText가 깔렸는지 확인하기
최신 버전의 sublimetext는 3버전입니다. 하지만 2버전도 유사한 방식으로 사용할 수 있습니다.
우선 아래 명령어를 터미널에 입력할 경우 실행이 되는지 확인해보세요.
코드를 그대로 복사해서 사용하세요!
1 2 3 4
# SublimeText3 의 경우 open /Applications/Sublime\ Text.app/Contents/SharedSupport/bin/subl # SublimeText2 의 경우 open /Applications/Sublime\ Text\ 2.app/Contents/SharedSupport/bin/subl
You can’t use linux commands like git or ssh on your cmd, so we’re going to use great shell program which named cmder.
First, click this link:cmder.zip to download cmder. (It may take times.)
Second, unzip downloaded cmder.zip file. (It’ll take some times too.) And then you got this!:
Execute cmder.exe in this folder. If you execute cmder.exe as a first time you’ll be see Security Warning like this: just click RUN.
And one time more, if you execute cmder for the first time, there will be another warning like this: click first option, “Unblock and continue”.
It’ll take some times when you run cmder first time. This wouln’t appear next time, so please wait for a moment!
If you see this, you’re ready to use cmder NOW!
If you’re following DjangoGirls Tutorial, you probably made folder named djangogirls. Let’s get into it.
cd is command to ender the folder! Let’s get into djangogirls folder with cd djangogirls.
Let’s start deploy then.
Deploy Azure Virtual machine
You’ll see this screen if you logged in to Azure Portal.
Let’s make Virtual machine with clicking VirtualComputer(가상 컴퓨터) button.
Now let’s add Virtual machine with ‘+Add’ button.
If you click + Add button, you’ll see another options which provides many OS. But we’re going to use Ubuntu Server today.
If you clicked Ubuntu Server there’ll be server lists like this: we’ll use Ubuntu Server 16.04 LTS.
Then you’ll see Create button. Click it!
You’ll see configure window when you click Create button. Fillout blanks like picture lower.
Username should be django (surelly this is not critical but you may encounter issues.
You may set your password on your own, but it shoud be longer/equal than 12. Please remember not to reset it later.
Select locaiton on Korea Centeral or SouthEast Asia(which available one).
Now we have to choose server size. We’ll setup just one django server so we’ll choose DS1_V2, the left one.
Don’t worry, you won’t be charged :)
Next step you have to setup storage settings. Just select Use managed disks to ‘Yes’.
And then click Network Security Group(Firewall) settings. After click on it, you’ll see pre-configured setting SSH (TCP/22). We’re going to add HTTP (TCP/80)
Click + Inbound Rule add Button, and fillout blanks like this and click OK button.
Now default settings are finished! Just click OK button.
And one more time, click confirm button.
And lastly, click confirm button more! I know you’re tired with confirm button, but this is process of Azure :)
If you see your azure dashboard again like this, your server deployment is finished :)
Please wait until your server is successfully installed! (This will take upto 5mins.)
Your browser will redirected to your server info page when your server is successfully installed.
Get Azure Server Configurations
You can access to your server info with clicking server icon-which tells Running.
On this page you can see your server’s ‘Public IP Address’. ip is set of numbers which provides your computer access to internet. We can upload and deploy our django project through this ip.
You can see this example server’s ip, 13.67.60.234. Surelly we can access to our server with this numbers but we can’t remember easily with it.
So we’re going to use domain like djangogirls.com to that ip.
First of all, copy(CTRL+C) your virtual machine’s ip!
Get free domain and connect to Virtual Machine
You may know about popular domains like .com or .net. But they are paid one(10 dollars per year) so we’re going to use free domain.
This Dot.tk provides .tk domains as free! I’ll check djangogirls-seoul-tutorial-en.tk as example. You should think of your own domain name and click Check Availability!
Oh, it’s available! Just click ‘get it now’ button and add to cart.
You’ll see this page when you clicked ‘checkout’ button. Just click ‘Use DNS’ button and input ip address of your virtual machine(azure) and click ‘Continue’.
If you forgot ip address of your virtual machine, go to Azure portal and check your machine’s ip again!
You’ll see checkout page and you have to login. You can login with your social media account like Google or Facebook!
Sometimes there are some errors(404 or others..) then you can restart from “Get free domain and connect to Virtual Machine” on this guide.
If you successfully logined, you’ll see form to input your info, but you don’t have to fill it all. Just click Agress Terms and conditions and Conitnue button, your order will be finished!
Great! You’ve just connect your own domain to your server!
Install Fabric3
Now your server is connected with yourdomainname.tk domain. But if you try to access to that address, you can see nothing at all.
Because your server doesn’t have any django code and ofcourse, even django!
We’ll upload and deploy our django project with just one command line through Fabric3.
Let’s install fabric3 on our computer. You can install fabric3 with this command:
1
pip install fabric3
Remember: NOT fabric BUT fabric3! Don’t forget 3. fabric is python2 project.
Change REPO_URL, PROJECT_NAME, REMOTE_HOST. Other values are already setup for djangogirls tutorial we followed.
Every values must be in “”!
Upload and deploy code thorugh Fabric3
We can use fabric through fab command. Like this: fab new_server, fab deploy, fab create_superuser. This commands will execute commands on remote server(azure virtual machine which we made)
When you use fabric for new server, just type this command and execute: fab new_server. this will install python3, apache2, and mod_wsgi to run django.
1
fab new_server
When you edit django code and committed & pushed to github, then use fab deploy command. This will fetch latest code on github and migrate db.
1
fab deploy
When you want to create superuser, just execute fab create_superuser and there’ll be creating superuser prompt.
1
fab create_superuser
Whoa!
You’ve just upload and deploy REAL working web service on Azure! Congratulation!
Django 서비스를 실제 서버에 배포하면 보안을 위해 프로젝트 폴더의 settings.py파일 안의 DEBUG항목을 False로 두고 배포합니다. 이렇게 디버그모드를 끌 경우 장고에서 기본적인 보안을 제공해 줍니다. 그러나 만약 View나 Model에서 Exception이 발생했을 경우 클라이언트에 흰색의 500에러 화면만을 띄워줍니다.
이 경우 개발자에게도 장고의 에러 화면을 보여주지 않습니다. 따라서 Exception이 발생할 경우 개발자(혹은 운영자)에게 에러를 전송할 필요가 있습니다. wsgi 기반으로 서버를 구동할 경우 에러로그는 Apache2나 NginX등의 웹서버의 접근/에러로그가 있으며 Wsgi의 에러로그로 두가지가 있습니다.
장고서버의 경우에는 Wsgi의 에러로그에 로그를 쌓습니다. 그러나, Django 프로젝트에 LOGGERS 설정값을 추가해줘야 하며 에러 트래킹을 따로 설정해줘야 합니다.
장고 프로젝트의 settings.py파일 안 INSTALLED_APPS에 아래 줄을 추가해줍니다.
1 2 3 4
INSTALLED_APPS = [ # 기존 앱 가장 아래에 추가해주세요. 'raven.contrib.django.raven_compat', ]
이제 Sentry용 환경변수를 추가해 줍시다. 아래 DSN_URL은 Sentry에 로그인 하신 후 Sentry for Django의 코드 부분을 복사하면 알 수 있습니다.
1 2 3 4 5 6 7 8 9 10 11 12 13 14
# settings.py 파일 import문 아래에 raven을 import해주세요. import os import raven
# import아래 환경변수를 설정해주세요. 이 URL은 위 Sentry for Django에서 바로 찾을 수 있습니다. DSN_URL = 'https://sampleurl1234141534samplesample:somemoreurl12341235dfaetr@sentry.io/123456'
# 기타 설정들(생략...)
# settings.py 파일 가장 아래에 RAVEN_CONFIG를 추가해주세요. RAVEN_CONFIG = { 'dsn': '{}'.format(DSN_URL), # DSN_URL을 위에 적어주셔야 동작합니다. 'release': raven.fetch_git_sha(BASE_DIR), # Django가 Git으로 관리되는 경우 자동으로 커밋 버전에 따른 트래킹을 해줍니다. }
Sentry wsgi.py에 설정하기
이제 장고 프로젝트 폴더 안의 wsgi.py 파일을 아래와 같이 수정해봅시다.
1 2 3 4 5 6 7 8 9 10
import os
from django.core.wsgi import get_wsgi_application from raven.contrib.django.raven_compat.middleware.wsgi import Sentry
# 이 부분은 여러분의 장고 프로젝트 이름을 쓰세요.. os.environ.setdefault("DJANGO_SETTINGS_MODULE", "장고프로젝트이름.settings")